 (Image via
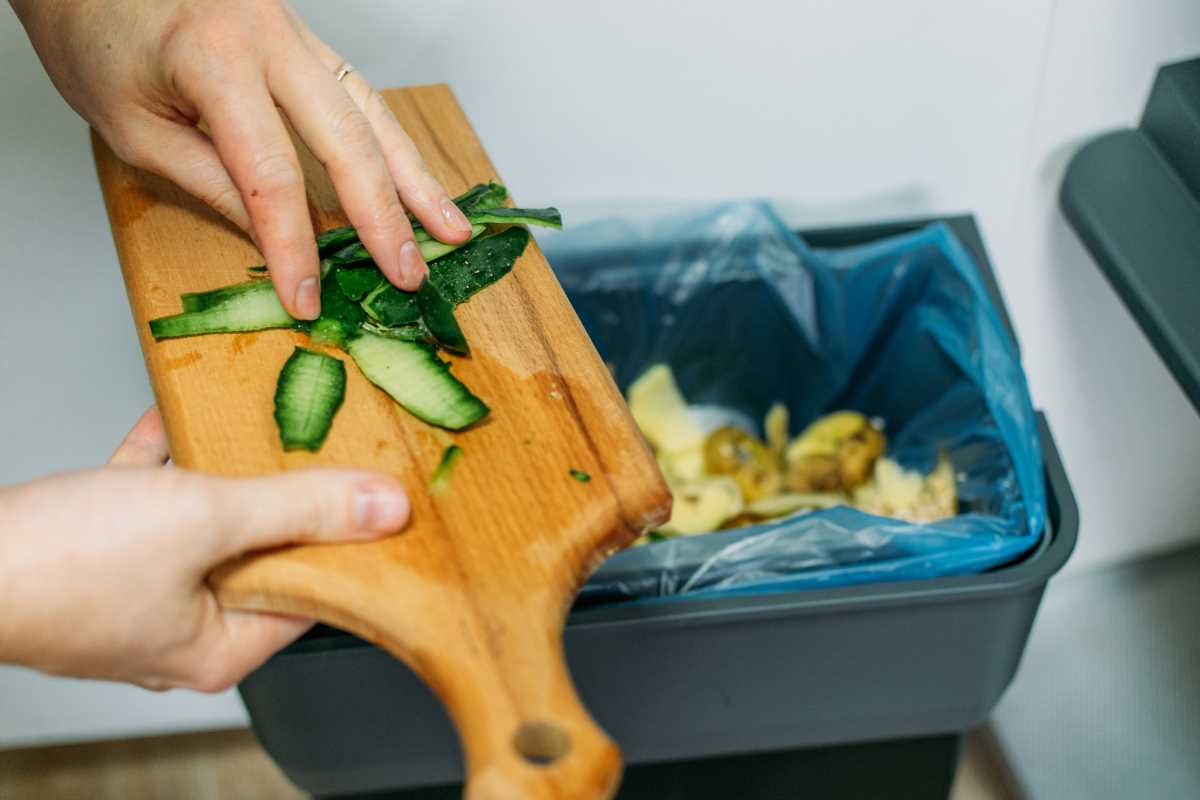
Kitchen scraps often build up quickly, and tossing them into the trash can feel wasteful and discouraging. Turning peels, cores, and coffee grounds into rich soil lets you give something back to your garden and reduce what ends up in the landfill. Shifting your approach to food waste can turn a routine cleanup into an engaging process that keeps valuable nutrients circulating right at home. By making a few easy adjustments, you can create a composting system that fits naturally into your cooking habits. Before long, composting will become second nature, and you’ll see your plants flourish thanks to the nutrients you’ve helped return to the earth.
Hidden Opportunities in Everyday Scraps
Cooking often results in small piles of fruit skins, vegetable ends, and tea leaves that most people ignore. Instead of throwing them away, see each remnant as a building block for rich soil. When you layer those bits with yard clippings or shredded paper, you open up a world of textural play—each piece breaks down at its own pace and adds character to the final compost. By mixing different textures, you create pockets of air and moisture that speed up decomposition and produce a more balanced soil amendment.
As you try different combinations, you’ll notice surprising aromas and colors appear in your compost. That change encourages curiosity: Which scraps break down the fastest? How can you adjust ratios to prevent soggy spots or dry clumps? This ongoing process turns kitchen waste into an evolving project. Sometimes that exploration involves mixing in unexpected ingredients like cotton scraps or shredded egg cartons, making every batch a new chance to learn.
Step-by-Step Setup for Your Compost Station
Choosing a Compost Container
Purpose: Hold food scraps while allowing airflow for decomposition.
Steps:
- Measure the width and height of your intended storage spot.
- Choose a bin with a tight-fitting lid and built-in ventilation holes.
- Drill additional holes around the sides if airflow is limited.
- Cost: Free upcycled buckets to $30–$50 small tumblers.
- Insider tip: Line the bottom with twigs or broken pottery shards to prevent moisture pooling.
Layering Green and Brown Materials
Purpose: Create an ideal microbial balance for faster breakdown.
Steps:
- Collect green materials such as fruit peels and coffee grounds.
- Gather brown materials like dry leaves, shredded paper, or cardboard.
- Alternate green and brown layers every two to three inches.
- Cost: Brown materials often cost nothing if sourced from yard waste or paper scraps.
- Insider tip: Keep shredded junk mail in a nearby bag for quick access.
Controlling Airflow
Purpose: Prevent odors and speed up composting by avoiding anaerobic conditions.
Steps:
- Insert a compost aerator rod or sturdy garden fork into the pile.
- Twist and lift to form air pockets throughout the material.
- Repeat every three days for consistent oxygen flow.
- Cost: Around $10 for a basic aerator rod.
- Insider tip: Schedule aeration on days you cook most often, when scrap volume is higher.
Managing Moisture Levels
Purpose: Maintain high microbial activity without waterlogging the pile.
Steps:
- Squeeze a handful of compost; one or two drops indicate ideal moisture.
- Mist lightly with a spray bottle if the pile feels dry.
- Add extra brown material and aerate more if it feels soggy.
- Cost: Under $5 for a mist spray bottle.
- Insider tip: Store the spray bottle next to the bin to build a consistent habit.
Harvesting and Preparing Mulch
Purpose: Separate finished compost for immediate garden use.
Steps:
- Spread contents onto a mesh screen or sieve.
- Shake gently to filter fine, finished compost.
- Return larger pieces to the active pile to continue breaking down.
- Cost: About $15 to make a sieve with hardware cloth.
- Insider tip: Store screened compost in an airtight container to retain moisture until use.
Adjusting Moisture, Airflow, and Texture
Finding the right balance between dampness and dryness feels like tuning a musical instrument. When compost becomes slimy, it indicates too much water has suffocated the microbes. If it crumbles like dry sand, it needs a little extra misting or green scraps. By feeling the texture in your hands and watching how it changes over days, you learn your home’s humidity and temperature rhythm. Each adjustment improves that harmony, resulting in fluffier, darker compost.
Airflow is essential for keeping odors under control and preventing a muddy interior. Once you settle into your turning routine—often every three days—you’ll notice the pile feels lighter and emits an earthy scent. Variations in texture reveal different microbe colonies at work. Coarse bits break down more slowly, providing ongoing air channels, while fine particles fill gaps and hold moisture. Recognize these layers as signs of a living system you guide rather than control completely.
Seasonal Changes and Troubleshooting
Cold winter weather slows microbial activity. To keep the process going, insulate your bin with blankets or move it indoors to a warm corner. Spring rains may flood outdoor setups; add more dry material and elevate the container. Summer heat speeds up breakdown but can dry out the pile. Increase misting and shade the bin from direct sunlight. Fall provides plenty of yard leaves—gather and store extra for year-round balance.
When odors become a problem, identify wet spots by smell and texture. Break them open, add fresh brown layers, and aerate thoroughly. If pests invade, secure the lids tightly or use a metal mesh barrier around the base. Citrus peels around the edges naturally repel ants. Different seasons present different challenges, but by paying attention to clues from your compost, you can anticipate and fix issues easily.
Creating a Routine for Consistent Composting Results
- Set up a small bucket with a secure lid near your countertop for scraps. Keep it close to your prep area to make sure every peel gets into the compost, saving time and preventing accidental landfill contributions.
- Make a weekly habit of checking your compost. Adding it to your schedule ensures you never forget to turn or check moisture, making it as natural as wiping down the counter after cooking.
- Use color-coded labels for green and brown inputs. This visual aid speeds up layering decisions and helps family members join in, making the process more social and less of a solo task.
- Keep a small journal or digital note of what ratios and aeration routines work best. Over time, you’ll recognize patterns that lead to consistently good compost, and you can adjust your routine according to seasons or kitchen scrap amounts.
- Designate a storage area for tools—a fork, spray bottle, and small shovel in one place. Having everything nearby makes routine maintenance quick and satisfying, turning composting into an easy part of your day.
Turn kitchen scraps into nutrient-rich compost with simple containers, careful layering, and regular attention. Soon, you will have dark, rich compost right on your countertop.